Flask Made Easy – Part 1: Setup
Course: 12DGT
Year Level: Year 12 (Level 7 – NCEA Level 2)
Unit / Module: 03_Full_Stack_Website_Project
Aligned Standard(s): AS91893 – Full-Stack Website Project
Series: Flask Made Easy (4 parts) — Part 1 of 4
Estimated Time: 1 lesson (~60 min)
Video: Flask Made Easy Part 1: Set up
1. Purpose of This Tutorial
By the end of this tutorial you will have:
- a working Flask "Hello World" application running locally
- your project pushed to a GitHub repository
- confirmed that version control (committing and syncing) works correctly
This tutorial is the foundation for everything that follows. If your Flask app does not run and your GitHub repo does not exist by the end of this lesson, you cannot progress.
Note: These notes accompany the video tutorial. Watch the video, then use these notes as a step-by-step reference while you work.
2. What You Need Before You Start
- Visual Studio Code installed
- Python 3 installed (check the version shown in the VS Code status bar at the bottom right)
- A GitHub account — your code will be stored here throughout the project
- Internet access
If Python is not working, raise your hand before continuing.
3. Step-by-Step: Setting Up Flask
Step 1 — Create Your Project Folder
Create a new, empty folder on your computer for this project. Give it a sensible name (e.g. flask-project or a name related to your topic).
Open that folder in VS Code: File → Open Folder.
Step 2 — Check Python is Working
Create a file called test.py and add:
print("Hello, World!")
Run it using the Run button (▶) or the terminal. You should see Hello, World! in the terminal output. Check the Python version in the bottom-right corner of VS Code — make sure it is Python 3.10 or newer.
Once confirmed, delete test.py. It was just a sanity check.
Step 3 — Install Flask
Open the VS Code terminal (Terminal → New Terminal) and run:
pip install flask
If Flask is already installed, pip will tell you. Either way, you are ready to continue.
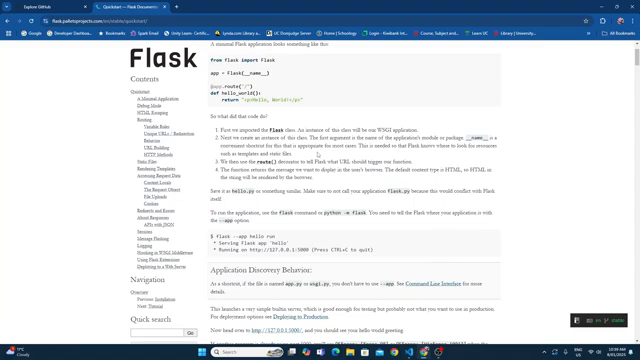
Why Flask? Flask is a lightweight Python framework that handles routing, requests, and responses for a web server. Without it, you would have to write all of that yourself.
Step 4 — Create app.py
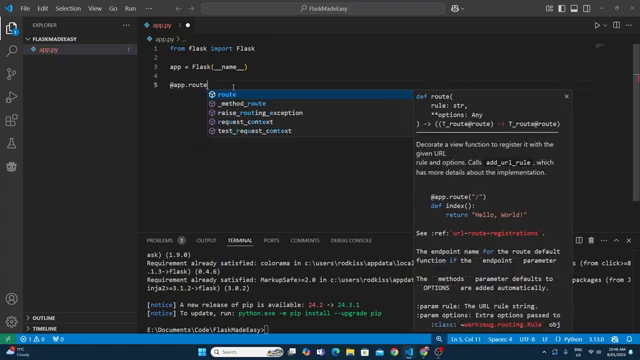
Create a new file called app.py. This is your main application file. Type the following carefully:
from flask import Flask
app = Flask(__name__)
# Home route
@app.route('/')
def home():
return 'Hello, World!'
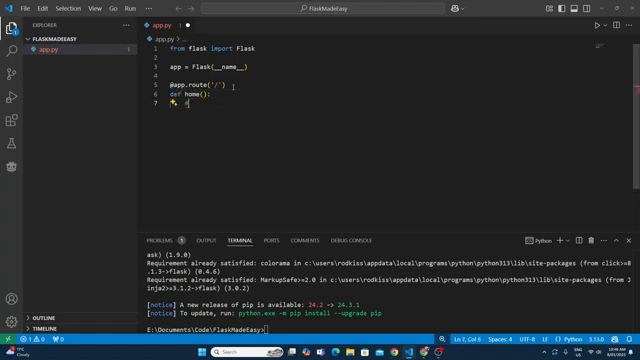
if __name__ == '__main__':
app.run(debug=True)
What each line does:
| Line | Meaning |
|---|---|
from flask import Flask | Import the Flask class from the flask library |
app = Flask(__name__) | Create the Flask application instance |
@app.route('/') | A decorator that maps the URL / to the function below it |
def home(): | The function that runs when someone visits that URL |
return 'Hello, World!' | The text sent back to the browser |
app.run(debug=True) | Start the server; debug=True means changes reload automatically |
Step 5 — Run the App
Run app.py using the Run button or terminal. You will see output like this in the terminal:
* Running on http://127.0.0.1:5000
Hold Ctrl and click that link. Your browser should open and display Hello, World!.
You now have a running Flask web server.
4. Understanding Routes
A route maps a URL to a Python function. Every page in your web application will be its own route.
Right now you only have one route — the home page (/). You will add more routes in later tutorials.
5. Step-by-Step: Setting Up GitHub
Version control is not optional on this project. Every change you make must be committed to GitHub. This protects your work and creates a record of your progress.
Step 1 — Sign In to GitHub in VS Code
Check the bottom-left corner of VS Code for your GitHub account. If you are not signed in, click there and follow the prompts to sign in.
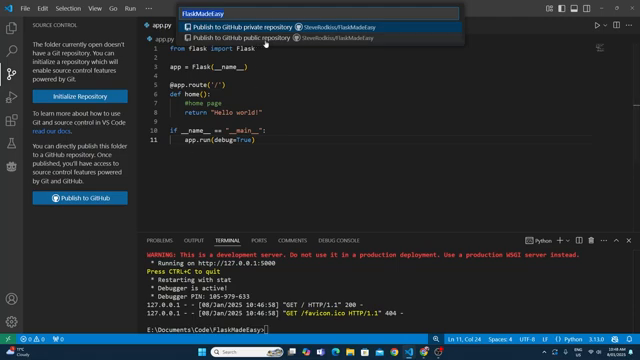
Step 2 — Publish to GitHub
Click the Source Control tab on the left sidebar (the branching icon). Click Publish to GitHub.
- Follow any authorisation prompts
- Choose Public repository
- Change the repository name if you want
- Click OK to publish
Step 3 — Verify on GitHub
Open your browser and navigate to your GitHub account. You should see your new repository with app.py inside it. If you can see the file and the code matches what is on your computer, everything is working.
Step 4 — Practice Committing
Make a small change to app.py — for example, change the return text to something different.
Then in the Source Control tab:
- Click the refresh icon if your changes do not appear
- Click Stage All Changes (the + icon next to "Changes")
- Type a short, descriptive commit message (e.g.
update home route message) - Click Commit
- Click Sync Changes to push to GitHub
Refresh your GitHub repo in the browser — your change should be visible.
Commit messages matter. A vague message like "stuff" is useless. Write something that tells you (and anyone reading) what actually changed. You will thank yourself later.
6. The Commit Habit
Every time you finish a meaningful piece of work in this project, you commit and sync. Think of it like saving your game at a checkpoint.
A good commit message is:
- short (under 72 characters)
- in the present tense:
add home route, notadded home route - specific:
add database connection helpernotupdate code
7. Common Issues
| Problem | Likely cause | Fix |
|---|---|---|
ModuleNotFoundError: No module named 'flask' | Flask not installed | Run pip install flask in the terminal |
Address already in use | Another Flask instance is running | Close other terminals or restart VS Code |
| Browser shows "This site can't be reached" | Server is not running | Run app.py first |
| Changes on GitHub do not appear | Forgot to sync | Click Sync Changes in Source Control |
8. Checkpoint
Before moving to Part 2, confirm all of the following:
-
app.pyexists in your project folder - Running
app.pystarts a server andHello, World!appears in the browser - Your project is published to a public GitHub repository
- You have made at least one commit and synced it to GitHub
- You can see your commit history in GitHub
If any of these are not done, fix them now. Part 2 builds directly on this.
9. Key Vocabulary
- Flask: A lightweight Python web framework for building web applications.
- Route: A mapping between a URL and a Python function.
- Decorator: A Python syntax (
@app.route(...)) that wraps a function with additional behaviour. - Debug mode: Running Flask with
debug=Trueso the server restarts automatically when you save changes. - Repository (repo): A folder tracked by Git; stores your code and its full change history.
- Commit: A saved snapshot of your code at a point in time.
- Sync / Push: Uploading your local commits to GitHub so they are stored remotely.
- localhost: Your own computer acting as a web server; accessed via
http://127.0.0.1:5000.
End of Flask Made Easy — Part 1: Setup